Tuesday 12 November 2013

Distress Inks Paint resist Technique

After doing Ranger U in April, I had great plans of how I was going to share what I had learnt and then, in July, my husband had a stroke and I dropped all but the essential to be with him. Fortunately, he has made a good recovery with only some field of vision still affected so it is time to start on some of those plans. I have continued to create, to teach and to participate in crops while I have missing from here so I have lots to share and I will.
Après avoir fait Ranger U en Avril, j'ai eu de grands idées de comment j'allais faire partager ce que j'avais appris et puis, en Juillet, mon mari a eu un AVC : Projets en attente! Heureusement, il a fait une bonne reprise avec seulement un champ de vision encore touché, tant il est temps de commencer sur certains de ces projets. J'ai continué à créer, d'enseigner et de participer à des crops, même si j'ai disparu d'ici, donc j'ai beaucoup de choses à partager et je le ferai.

I have planned to create videos as a way of sharing with those people who can't get to my workshops. The first one is now live, created for the November challenge on 'Coeur de Scrap' forum. It shows the paint resist technique: How acrylique paint, in this case Adirondack dabbers, will resist the water-based Distress Inks. It is one of my favourite techniques especially for backgrounds on cards and tags.
J'ai prévu de créer des vidéos comme un moyen de partager avec ceux qui ne peuvent pas se rendre à mes ateliers. Le premier est maintenant en ligne, créée pour le défi Novembre sur le forum "Coeur de Scrap". Il montre la peinture résiste technique: Comment la peinture acrylique, dans ce cas des ‘Adirondack Dabbers’, va résister aux encres Distress à base d'eau. Il est l'un de mes techniques favorites surtout pour le fond des cartes et des tags.


The video has no talking, just background music, and the technique is explained by French sub-titles so it can be silenced and watched without disturbing others. If you don't read French I still think it is fairly self-explanatory and if you have questions feel free to leave me a comment. All constructive comments are appreciated.
La vidéo n'a pas de son, sauf la musique, et la technique est expliquée par sous-titres français pour qu'il puisse être regardé sans déranger les autres. Svp à me laisser un commentaire et/ou poser des questions.

Photos of the cards featured:
Des photos des cartes vues dans la vidéo:

All 3 cards are using stamps from Tim Holtz 'Mini Holidays #2' with Adirondack 'Dabbers' and Distress Inks for the backgrounds. The text stamps are from Florilèges Designs.
Les 3 cartes utilisent des tampons de Tim Holtz 'Mini Holidays #2' avec des Adirondack 'Dabbers' et les encres Distress pour les fonds. Les tampons textes sont de Florilèges.


I'll be back to explain more about the tag as that is from a workshop I taught in October.
Je serai de retour pour expliquer plus sur le tag car c'est à partir d'un atelier que j'ai appris en Octobre.
You can follow this blog or like the Kerudoc Creation facebook page to make sure you don't miss any future posts or videos.
Vous pouvez suivre ce blog ou aime la page facebook de Kerudoc Création pour s'assurer que vous ne manquez pas des postes ou des vidéos à venir.

Monday 10 June 2013

Scraplift

The association at Tourc'h did a scraplift of a page by Nini : Here is my version with photos of a day out at Legoland (Windsor, UK).

Les participants de l'association à Tourc'h ont fait un 'scraplift' (pris inspiration) d'une page par Nini. Voici ma page après une journée à Legoland, Grande Bretagne. 

With the tag and opening flaps, I have used 8 photos on there. 
The papers and stickers are Echo Park's 'Everyday Eclectic'.

Inclut l'étiquette et les rabats, j'ai inclus 8 photos. Les papiers et autocollants sont d'Echo Park 'Everday Eclectic'.

Sunday 9 June 2013

The London Marathon

I did say some weeks ago that I'd be back with more on the London Marathon so now I'm playing catch-up: Here is the page I made to celebrate the Marathon where my step daughter raised over £3,000 for the Tubular Sclerosis Association.

Dans les vacances scolaires, nous avons commencé notre voyage en famille avec quelques jours à Londres inclut le Marathon où ma belle-fille a recueilli plus de £3000 pour l'Association de la sclérose tubulaire. Voici une page qui célèbre cet événement.


Wednesday 29 May 2013

Thursday 23 May 2013

Porte ouverte

Notre première porte ouverte sera 10h00 à 18h00 le samedi 25 mai à Kerudoc, St Yvi, Finistère sud. Je vendrai ma gamme de produits de scrapbooking avec beaucoup de réductions.
Cliquez ici pour la carte de direction. J'ai hâte de vous voir :)

Merci de toute le monde qui est passé hier, une super journée et en soleil! J'apprecié votre support.

Monday 20 May 2013

Crop - Scrap en Bretagne

Thanks to the association Scrap en Bretagne at Quimper for a great day yesterday. They invited me to teach the mini album that I first taught earlier in the year. Thank you to Hélène for sending me this photo too :)

Merci à l'assoc Scrap en Bretagne à Quimper pour une super journée hier. J'ai ensigné un mini-album de A à Z et tout le monde a (presque) fini. Ils m'ont invité à enseigner le même mini-album que j'ai fait plus tôt dans l'année pour l'association à Bannalec. Merci Hélène pour la photo :)

Saturday 18 May 2013

Ranger U

I'm back, and now a certified Ranger educator! Wow, it was a great trip although it has taken me ages to catch up with everything since getting back. As it was school holidays, we traveled as a family starting with a few days in London (more on that to come). Our first visit to the USA started with Washington, which we loved, and then New Jersey for Ranger U while my husband and son explored the area and great coastline. Then we rounded off with a few days in New York before flying back. So, tons of photos to scrap!

At Ranger U we all had a fantastic time working away at 90 techniques in the 3 days! Tim Holtz taught us techniques using the ranges of Distress and Adirondack Inks and paints, Perfect Pearls and the Melt Pot. Claudine Hellmuth taught us about her Studio line of paints, gel mediums, stencils and canvas. Dyan Reaveley taught us art journalling techniques with her Dylusions range of ink sprays, stencils and stamps. And, missing from the photo here, is also the lovely Mackie Mullane with whom we made lots of jewelry using Vintaj pieces with Ranger's patinas. All great teachers and fantastic artists. It was great meeting the other particpants too, especially Annette and Marjie who I have known for some years on the All Things Tim Yahoo group. I think everyone has beaten me to doing a write up and certainly there are already photos on Tim's and Ranger's blogs.
Me, Tim Holtz, Claudine Hellmuth, Dyan Reaveley

Je suis de retour, et maintenant un éducateur certifié par Ranger! Wow, c'était un beau voyage mais il m'a fallu âges pour rattraper tout reprendre depuis. Comme c'était les vacances scolaires, nous avons voyagé en famille commençant par quelques jours à le Marathon à Londres (à suivre). Notre première visite aux Etats-Unis a commencé à Washington, que nous avons adoré, puis New Jersey pour Ranger U tandis que mon mari et mon fils ont exploré la région et un grand littoral. Ensuite, nous avons arrondi avec quelques jours à New York avant de reprendre l'avion. Ainsi, des tonnes de photos à scraper!

Au Ranger U nous avions tous un temps fantastique si intense: 90 techniques dans les 3 jours! Tim Holtz nous a enseigné des techniques utilisant les gammes de Distress et d'encres et de peintures Adirondack, Perfect Pearls et le 'Melting Pot'. Claudine Hellmuth nous a enseigné sur sa gamme 'Studio' de peinture, médiums de gel, des pochoirs et de la toile. Dyan Reaveley nous a enseigné les techniques 'Art Journal' avec sa Dylusions gamme d'encre, des pochoirs et des tampons. Et, absente sur la photo ici, c'est aussi la belle Mullane Mackie avec qui nous avons fait beaucoup de bijoux en utilisant des pièces laiton de Vintaj avec les patines de Ranger. Tous les grands maîtres et artistes fantastiques. C'était génial de rencontrer les autres particpants aussi, surtout Annette et Marjie que je connais depuis quelques années sur le All Things Tim groupe Yahoo. Il y a déjà quelques photos sur le blog de Tim (je suis dans le pull vert, mais caché dans la photo groupe) et le blog de Ranger ici et ici.

Thursday 11 April 2013

Tags...and exciting news...mon excellentes nouvelles

I finally grabbed a little time to make some tags yesterday: These are inspired by Tim Holtz's tags for January and April: All the techniques are on Tim's blog.
J'ai pris un peu de temps hier de creer deux étiquettes inspirées par Tim Holtz tags de janvier et avril.

For January's tag, I used Sizzix Retro Circles embossing folder on a #8 manilla tag which was the coloured with Distress Inks, Sizzix Gadget Gears die on Grungepaper and I coloured the larger two with Distress Stains  and the small one with Adirondack Copper Dabber, all sanded and then inked. The ribbon was inked with Weathered Wood Distress Stain and stamped with Archival Jet Black. The idea-ology embellishments I used were Sprocket Gears, Mini gears, Muse Token, Adornment wings and the Filmstrip Ribbon.
Pour la étiquette de janvier, j'ai utilisé le classeur embossage de cercles 'Retro' et l'encres Distress (Iced Spruce (gris), Tumbled Glass (bleu), Wild Honey (miel), Vintage Photo, Walnut Stain (marron foncé)). J'ai découpé le Grungepaper avec la matrice d'engrenages chez Sizzix et j'ai coloré les deux grands pièces avec les Distress Stains Brushed Pewter (argenté) et Tarnished Brass (laiton) et le petit avec le peinture cuivre d'Adirondack. J'ai coloré le morceau du ruban avec le Distress Stains 'Weathered Wood' et je l'ai tamponné avec l'encre Archival. J'ai embellit mon étiquette avec des 'idea-ology' Sprocket Gears (engrenages), Mini gears, Muse Token, Adornment (ailes) et le Filmstrip Ribbon (pellicule). 

For April's tag I played with the new Distress Paints! I love them: Much more fluid than I expected and they blend wonderfully. I used Weathered Wood, Broken China and Peeled Paint but I haven't got the colours in stock yet so I added other colours from PaperArtsy (Old Gold, Pesto and Beach Hut) and another copper paint to get a good mix of colours. I used Weathered Wood Distress Stain on the ruler ribbon and the Distress Paints on the other ribbon and metal embellishments - Mini Sprocket Gears, Word Band, Pen Nib and Corner.
Sur l'étiquette d'avril j'ai utilisé les nouvelles peintures Distress! Très fluides: Je l'adore! J'utilisé Weathered Wood (gris), Broken China (bleu) et Peeled Paint (vert) mais je n'ai pas encore reçu tous les couleurs donc j'ai également utilisé les peintures chez PaperArtsy. J'ai utilisé Distress Stains 'Weathered Wood' sur le ruban règle et les Distress Paints sur l'autre ruban et les embellissments de métal 'idea-ology'.

And the news.....I have been accepted for Ranger U !!! A dream come true and all I have been able to think about since I got the email from Tim himself offering me a place: Only 2 weeks to go and I still can't believe it. Ranger U is held in New Jersey, USA and is a 3-day course for retailers, designers and instructors by some of the top people in the industry. Obviously, I will have lots to blog and share when I get back!
Et mon bonne nouvelles...J'ai une place à Ranger U ! Mon rêve devenu réalité! Je trouve qu'il est difficile de se concentrer sur autre chose depuis j'ai reçu le mail de Tim Holtz soi-même qui a confirmé ma place! C'est en 2 semaines et aux Etats-Unis: Un cours de 3 jours pour les vendeurs, dessiners et animateurs et donné par quelques-uns des plus grands noms du scrapbooking. J'aurais  beaucoup à partager quand je reviendrai!

Tuesday 9 April 2013

Adventures in art journalling

It's been two weeks since I did a crop with Manuéla Jamet - photos of the day, including of my shop and I, are on the Carhaix'ment scrap blog. However, no one finished the project, creating an art journal, on the day and I still haven't. So, for now, here are just a few photos of the back of the journal (label on the front isn't finished but otherwise it is similar) and 2 pages that I'm considering finished.
Il y a déjà deux semaines depuis que j'ai fait une crop avec Manuéla Jamet - photos de la journée, y compris ma boutique et moi, sont sur le blog de l'assoc Carhaix'ment scrap. Mais, personne fini son 'art journal' là et je n'ai pas encore. Donc, pour ce moment, voici seulement quelques photos du dos et deux pages que j'ai fini (la prémiere est similaire à l'arrière mais je n'ai pas encore fini l'étiquette).

The covers are made of chipboard with thinner card strips glued on then gessoed, painted, stenciled, sponged with contrasting paint, stamped with black Archival ink and detailed with Neo-colour II and a water brush.
Les couvertures sont carton épais (chipboard) avec des bandes du cartonnette collé. Alors l'entière était peinte au gesso, au couleur,  une partie peinte à nouveau sur une masque, épongé aux bords avec un couleur complémentaire, tamponné avec l'encre Archival et détaillé avec des crayons Neo-colour II et un pinceau d'eau.
The pages are thinly painted with different colours and then details added with more paint, stenciling, stamping, hand writing, doodling, and whatever else you fancy. They are edged with Black Soot Distress Ink.
Les pages ont été peints avec des différentes couches des peintures acryliques, et décorés avec du papier, les peintures sur masques, tamponnage et des gribouillages des stylos peintures. Les pages ont été encrés aux bords avec l'encre Distress noir (Black Soot).

I still have 5 pages to finish so when I get the time...
J'ai 5 pages à finir, alors quand j'ai un peu de temps...

Saturday 23 March 2013

Crop avec Karine Casenave-Tapie

Big thanks to everyone at the Quimper crop last weekend - for the welcome, organisation and all the purchases you made! The association Art-ty-scrap invited me to take my shop to the 2 day crop with Karine Casenave-Tapie and Marie-Nicole Alliot who taught 2 beautiful and very different mini-albums. 
Un grand merci à tout le monde qui était à la Crop à Quimper le week-end dernier - pour votre accueil chaleureuse, toute l’organisation et, bien sûr, à tout le monde pour vos achats! L'association Art-Ty-Scrap m’a invitée de prendre ma boutique à la crop avec KarineCasenave-Tapie et Marie-Nicole Alliot (Mani) qui ont présenté deux très beaux projets. Un superbe crop de convivialité et de partage!

Here is a taste of the album I created with Karine, almost finished on the day and now all done with 41 photos inside! I needed to finish sticking in embellishments and I used my 'Studio' paints by Claudine Hellmuth at Ranger to add colour to some papers and the chipboard alphabet. (If you are wondering why we look cold in usually hot Majorca - It was February cold snap!) 
Voici un aperçu de l’album que j’ai fait avec Karine : J’ai presque fini l’album le jour même et maintenant il est terminé avec 41 photos dedans! Pour le finir, j’ai eu besoin de coller les embellissements et j’ai utilisé mes peintures ‘Studio’ par Claudine Hellmuth (chez Ranger) d’ajouter des couleurs aux quelques papiers et l’alphabet chipboard. (Pourqoui nous sommes froid à Majorca? Il était en février!)


I strongly recommed a crop with Karine - very kind and great use of inks, colours and, above all, the structure of this album which I love - lots of lift-up, fold out, and accordions of photos with painted fabric binding. 
Je recommande vivement un crop avec Karine: J'ai apprécié sa gentillesse, son utilisation des encres, ses couleurs et surtout la structure de cet album que j’adore - beaucoup d'interaction et des accordéons des photos avec une reliure de tissus peinte.

I'll soon show the album made with Mani, who is equally lovely. I'm happy to say that I already have a place, with my shop, at another crop with her in Carhaix on 29th September. 
Je vais prochainement montrer l’album fait avec Mani, également super gentille. Je suis contente que ma boutique et moi-même ont déjà les places à travailler avec Mani à nouveau à Carhaix le 29 septembre :)

In the meantime, too impatient to see the ladies at Carhaix, I am there tomorrow at a crop with Manuéla Jamet. It's been ages since I last saw Manuéla so I'm very happy to be going tomorrow.
Mais, j’ai trop impatient de voir les filles de Carhaixment'scrap à nouveau! Je suis là demain, le 24 mars 2013, avec Manuéla Jamet ! Long temps depuis j’ai vu Manuéla alors je suis encore super contente d’aller demain.

Monday 11 March 2013

Ink Sampler

I have had so much demand for my mini-album that I have reordered the papers and I will be repeating that class and offering it as a kit so, if you are interested, contact me or watch this space or Facebook!
So, putting off sharing more of that for a while, I thought I'd concentrate on the photos that I used inside that album of a crafty long weekend: I sponsor the forum Coeur-de-Scrap and each year I spend 4 days at our get-together teaching, selling and generally having fun. In 2010 I did a Distress Ink workshop and last year they asked me if I would again concentrate on inks - When to use which ink and why. I concocted a little project which uses different inks on different surfaces and demonstrates some of the different properties of these.

J'ai eu beaucoup de demande pour mon mini-album et j'ai donc commandé à nouveau les papiers de répète l'atelier et créer des kits: Si vous êtes intéressé, mail-moi ou suivi ici ou sur Facebook! Alors, pour ce moment, je vais partager quelques de mes photos dedans cet album: Je suis un sponsor du forum Coeur-de-scrap et, chaque année, je partage quatre jours de rencontre avec mes copines de scrap où j'anime un atelier, vendre des matériaux et rit beaucoup! En 2010 j'ai fait un atelier d'encre Distress et l'année dernier les filles m'ont demandé de faire un atelier d'encre à nouveau: Quelle encre pour quelle matériel et pourquoi? Voici mon petit projet qu'utilise des encres différentes sur des surfaces différentes.
We used Distress Inks on ribbon, cardstock, wood and manila tags (and plaster embellishments in some cases), overstamping some with Archival or spraying with Perfect Pearls Mists. We used Stazon on plastic, colouring the reverse with acrylic paints, and we used Alcohol Inks and Mixatives on metal, including the eyelets.
Nous avons utilisé d'encres Distress sur du ruban, papier, bois, et tags (et, dans certains cas, des embellissements en plâtre), tamponné quelques avec l'Archival et vaporisé d'autres avec les Perfect Pearls Mists. Nous avons utilisé Stazon sur plastique, coloré avec des peintures acryliques, et d'encres alcools 'Alcohol Inks' and les  'Mixatives' pour les effets métalliques et nacré sur du métal, y compris les oeillets.

Here is Sylvie's piece:
Voici le superbe travail de Sylvie


Marose's lovely piece:
Voici la jolie pièce de Marose:


Annabel with her lovely piece:
Annabel avec sa belle pièce:

Jeanne's work: Love the colours of alcohol inks!
De Jeanne: J'adore ses couleurs d'encre alcool!

And Marilou's project - lovely mix of colours and materials.
Et le projet de Marilou - J'adore la mélange de couleurs et de matériels.

Some photos of the ladies enjoying the class and the travelling shop:
Des photos dans la classe et la boutique intinérante:


I'm looking forward to seeing everyone again this year!  
Je suis impatient de revoir tout le monde cette année!

Friday 8 March 2013

Techniques with Distress Ink & Perfect Pearls

One of the associations I work with asked me to do a class showing them how to use Distress Inks. These ladies do lots of crafting of all sorts but are relatively new to stamping: Only some of them owned Distress Inks and one had just bought some Perfect pearls, so I created 3 cards to get them using a few different techniques.
Une assoc de Bannalec m'a demandé à faire un atelier d'encre Distress. Quelques de ces femmes sont débutantes de tamponnage et de Distress mais une a récemment acheté des poudres Perfect Pearls. Donc, j'ai créé 3 cartes de techniques variées.
For the first card I used a mask cut with Nestabilities Labels 1 to apply Distress Inks (here Scattered Straw, Wild Honey and Shabby Shutters) before over-stamping images from Inkadinkado with Archival Jet Black.
Sur ma première carte j'ai utilisé une masque découpé avec Nestabilities Labels 1 et j'ai ajouté les Distress (ici Scattered Straw, Wild Honey, Shabby Shutters) avant de tamponner  des images d'Inkadinkado avec l'Archival noir.

Some variations which have been sprayed first too:
Des variations qui étaient encré par vaporisateurs en avance:


and one which uses text (Florilèges: Chers souhaites) as the main focus stamped with Archival Maroon.
et une avec le tampon Florilèges 'Chers souhaites' et tamponner avec l'Archival Maroon (bordeaux).

The second card uses the Inkadinkado Winter Trees image embossed with white sparkly embossing powder. This is then used a resist as the background is painted with Perfect Pearls ('Naturals' Prune, Rust and Blue Smoke), Distress Ink (here Dusty Concord) and water mixed together using the Ranger Craft Sheet as a palette.
La deuxième carte utilise un scène d'Inkadinkado embossé avec de poudre blanche pailleté. Cette embossage résiste l'encre lorsque j'ai coloré le fond avec les Perfect Pearls (Prune, Rust and Blue Smoke de 'Naturals' set), l'encre Distress et de l'eau mélangé sur le tapis teflon 'Craft Sheet'. Difficile à voir dans les photos mais l'effet est très nacré.


Again, a variation with a paler, frosty look.
Une variation plus pâle.


The third card shows the different members of the Distress Ink family as we used the 'Scribble technique' using Distress Ink pads (here Peacock Feathers & Picked Raspberry) and Re-inker (Vintage Photo) applied direct to the craft mat, sprayed with water and some white card dipped in to it. We dried and cut this sheet to size and then used Picket Fence Distress Stain to stamp the big text stamp from the Tim Holtz Papillon set to add more texture. We used the off-cuts to stamp and die-cut our greeting (here Florilèges Chers souhaites and Nestabilities Curved Rectangles) and a butterfly (Sizzix -Hero Art Butterflies 3 set). This had detail colour added with Cut-n-Dry nibs and the pieces were edged with Distress using an Ink Blending Tool before being mounted on the card blank.
La troisième carte montre the différent types de Distress - Nous avons utilisé le technique gribouille: Ajoute l'encres Distress sur le tapis teflon, ajoute l'encre recharge(en quantité très limité), vaporise de l'eau et mettre le papier sur l'encre. Sécher, retailler et tamponner avec la Distress Stain blanche 'Picket Fence'. Nous avons utilisé des chutes du papier pour les tamponner le texte et le papillon. Le détail était ajouté avec les 'Cut-n-Dry Nibs' et les morceaux ont encré avec les Distress et l'outil 'Blending Tool' avant de les montrer sur la carte.


Friday 1 March 2013

Winter 'Tim' tags

Before winter leaves us, I thought it time that I shared my winter tags inspired by Tim Holtz's December tags (yes, just 3 months behind!!!):
Avant l'hiver nous quitte, je vais vous montrer mes étiquettes inspirée par Tim Holtz' étiquettes de décembre (Oui, 3 mois en retard!!!). 
I used the same technique of inking the tags and ribbons with a mix of Distress Stains - Fired Brick and Tarnished Brass on the first one; Broken China and Brushed Pewter on the second. I used the same general layout as Tim showed on his tags and added stamping to the backgrounds and different dies as the main features on the tags. I was particularly excited to use the Snowflake Rosette die with foil on card to create the centre piece for the blue card: Love it!
J'ai utilisé les même techniques de colorer les étiquettes et rubans avec une mélange de Distress Stains - Fired Brick (rouge) et Tarnished Brass (d'oré) sur la première; Broken China (bleu) et Brushed Pewter (étain) sur la deuxième. Elles ressemblent les originales modèles mais j'ai ajouté les tamponnages aux fond et j'ai utilisé les découpes différentes. J'adore la rosace de flocon découpé de alu auto-collant sur papier épais.
Materials: Both tags: Ranger Manila tags #8, Tim Holtz stamps 'Mini Holidays 2'. Tag 1: Distress Stains Fired Brick & Tarnished Brass; Distress Inks: Forest Moss, Vintage Photo; Ink-blending toolAdirondack dabber: Gold; Stickles Rock Candy;  Tim Holtz idea-ology Sanding grip, Journal Ticket & 'Melange' tissue paper; Tim Holtz Kraft Core cardstock; Tim Holtz Sizzix dies: Tattered Florals, Elegant flourishes, Vintage Market alphabet, Festive GreeneryTag 2: Distress Stains: Broken China & Brushed Pewter; Distress Inks: Broken China; Foil; Adirondack Dabber: Silver; Stickles: Crystal Ice; Tim Holtz idea-ology: Tissue tape, Tinsel, Tiny Attacher & Mirrored; Tim Holtz Sizzix dies: Word Play alphabet; Snowflake Rosette.
Matériels: Les deux étiquettes: Ranger Manila tags #8, Tim Holtz tampons 'Mini Holidays 2'Etiquette 1: Distress Stains Fired Brick & Tarnished Brass; L'encre Distress : Forest Moss, Vintage Photo; l'outil Ink-blending tool; peinture: Adirondack dabber: GoldStickles Rock Candy;  Tim Holtz idea-ology Sanding grip, Journal Ticket & 'Melange' papier soie; Tim Holtz Kraft Core cardstock; Tim Holtz Sizzix matrices: Tattered FloralsElegant flourishesVintage Market alphabetFestive GreeneryEtiquette 2: Distress Stains: Broken China & Brushed Pewter; L'encre Distress : Broken China; Alu auto-collant; peinture: Adirondack Dabber: SilverStickles: Crystal Ice; Tim Holtz idea-ology: Tissue tape, guirlande, agrafeuse: Tiny Attacher & Mirrored; Tim Holtz Sizzix matrices: Word Play alphabet; Snowflake Rosette.

I also had 3 different groups making these with me where I was happy to explain the techniques in French. Many of them made tags with me last year so I asked what they did with them: No-one gave them away as cards or tags - They all kept them and were pleased to add to their collection!
Trois groupes ont fait les étiquettes avec moi et plusieurs ont les fait l'année dernière aussi: Toutes a gardé leurs étiquettes et étaient ravie d'ajouter à la collection pour leurs décorations.


This is how I displayed mine this year: A photo hanging system from IKEA where you cut the cord to the length wanted and use clips to create the display: Easy to change with the seasons. Time for me to catch up the Tim Holtz tags of 2013!
Voici ma collection: Pour montrer mes étiquettes sur le mur j'ai utilisé un système de crochets de chez IKEA: Facile à changer en fonction des saisons. Maintentant, j'ai besoin de faire les premières 3 étiquettes de Tim Holtz de 2013!

Friday 22 February 2013

Atelier Mini-album 'Souvenirs précieux'

Just wanted to share a little peek of the album I taught at the Bannana'Scrap association in January. I'm not showing a lot of the album as I will be teaching it to a final class the 2nd March and then I'll reveal all! ETA- Class is already full, thank you.
Un petit aperçu de l'album que j'ai animé à l'assoc Bannana'Scrap (Bannalec, 29) en janvier. Je vais répéter l'atelier le 2 mars et alors je vais partager plus de photos. (L' atelier est complet - merci)


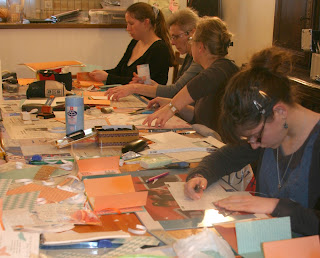
And here are some of the Bannana'scrap group working away: I have done many crops and workshops with this group: Always great fun!
Et voici l'assoc en plein travail: J'ai fait plusieurs ateliers et des crop avec ce groupe: 

Toujours beaucoup de rire! Toujours gentilles: "Bonjour Karen...merci aussi pour le super atelier que tu nous as animé ! Je suis très contente du mini album qu'on a fait, je crois que je vais en faire 3 autres, pour faire un coffret "4 saisons" pour la première année de notre bébé ! Le bleu et orange sera celui de l'été." Et toujours un plaisir pour moi.

Saturday 16 February 2013

Souvenirs précieux

At the 'Tourc'h 2 scrap' association last night we took inspiration from a page in the latest Esprit de Scrap magazine to use just one stamp -Florilèges Easy-mini 3 - a stamp divided into sections of patterns and the text 'souvenirs précieux'. Here is my page with photos taken at Rospico Gardens back in 2007:
Hier soir, à l'assoc 'Tourc'h 2 Scrap', nous avons pris l'inspiration d'une page dans la revue Esprit de Scrap de faire une page avec un seule tampon: Florilèges Easy-mini 3, un tampon divisé aux motifs et du texte 'souvenirs précieux'. Voici ma page avec des photos pris à les jardins de Rospico de 2007.

I used Bazzill 'Capers' as my base and stamped on to pieces of cream, green and grey card with Distress Ink Vintage Photo and Archival Inks Olive and Black. I heat-embossed each stamping with transparent powder and then cut apart the pieces I wanted to use and arranged them with my photos, some flat, some on 3D foam. A quick page and I really like the result.
J'ai utilisé Bazzill 'Capers' au fond et tamponnée des morceaux de papiers crème, vert et gris avec d'encres Distress Vintage Photo et Archival verte Olive et noir. J'ai embossé chaque pièce avec la poudre d'embossage transparente puis j'ai découpé mes tamponnages en pièces et sélectionné quelques morceaux de positionner avec mes photos, soit à plat ou sur de la mousse 3D.

Thursday 14 February 2013

Garden Party

I'm dreaming of Spring: We had our first sunny day in ages today! This card uses Sketch Saturday #245. As well as the obvious layers of embellishments, the details include cutting the leaves in half to extend their length, gluing the ends of the twine against fraying and the ric-rac bow to get the ends flat so I'm entering the Cute Card challenge too.
I used a Dovecraft square card blank with Dovecraft Garden Party papers and button, Inkadinkado Utopiary stamp inked with Olive Archival ink and embossed with clear powder, Nestabilities classic and scalloped circles, flowers die-cut with Sizzix Tattered Flower Garland, leaves from MS punch, Tea Party twine and MME ric-rac ribbon. I inked the edges of the papers with ColorBox chalk ink.
Aujourd'hui était ensoleillé et je rêve de printemps! J'ai utilisé le modèle #245 du blog Sketch Saturday et le défi du 'détails' du Cute Card Thursday.
Matériels: Dovecraft carte carré, papiers et bouton de la gamme Dovecraft Garden Party, tampon Inkadinkado 'Utopia' avec l'encre Archival en verte olive et poudre d'embossage transparente, Matrices Nestabilities Cercles et Cercles festonnés, fleurs découpé avec la matrice Sizzix Guirlande de fleurs en loques, feuilles de perforatrice Martha Stewart, ficelle de Tea Party, ruban ric-rac et l'encre ColorBox verte au bords du papiers.

Saturday 9 February 2013

Scrapping Gangnam Style!

I knew when I saw Sketchabilities #84 that I wanted to use it to capture this moment in time - My son (12) doing  'Gangnam Style' moves with his nephew and nieces (2 & 4) to the video on TV.
I used: Bazzill, printed paper from stash, white acrylic paint flicked with a brush and stamped with the lid of a mini mister, journaling printed on white paper then coloured with Milled Lavender Distress Ink and an ink blending tool, Nestabilities Circles, Dovecraft circle punches, Cuttlebug embossing: Tiny Bubbles, Sizzix Tim Holtz alphabet die: Word Play, Inkssentials white pen.
Ma page de Sketchabilities #84 capte mon fils (12 ans) et son neveu et ses nièces (2 et 4 ans) dansent avec la vidéo 'Gangnam Style' sur la télévision!
J'ai utilisé: Bazzill et papiers avec peinture acrylique éclaboussée avec une brosse et tamponnée avec le bouchon d'un vaporisateur 'Mini Mister', écriture imprimée sur du papier blanc coloré avec l'encre Distress 'Milled Lavender' et l'outil d'encre, Nestabilities Cercles, perforatrice cercle de Dovecraft, d'embossage Cuttlebug Mini Bulles, matrice Sizzix alphabet 'Word Play', stylo blanche d'Inkssentials.